M653, M655 and M665 PIN (010001- )
Introduction
Safety Signs
Controls
Operating Machine
Replacement Parts
Service Machine Safely
Service Interval Chart
Service Lubrication
Service Engine
Service Transmission
Service Steering & Brakes
Service Mower
Avoid Injury From Contacting Blades
Removing and Installing Mower Deck Foot Plate
Removing and Installing Mower Deck Belt Shields
Replacing Mower Deck Drive Belt
Checking and Replacing Mower Blades
Service Electrical
Service Miscellaneous
Troubleshooting
Storing Machine
Assembly
Specifications
Warranty
John Deere Service Literature
John Deere Quality Statement
CopyrightŠ Deere & Company

Service Mower
Avoid Injury From Contacting Blades
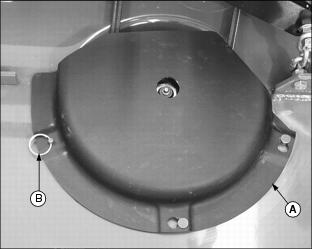
Removing and Installing Mower Deck Foot Plate
Removing Foot Plate
1. Park machine on a hard, level surface.
2. Stop engine and engage park brake.
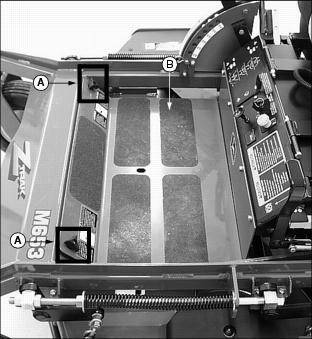
3. Loosen and remove knobs (A).
4. Remove foot plate (B) from front frame assembly.
Installing Foot Plate
2. Install and tighten knobs (A).
Removing and Installing Mower Deck Belt Shields
Removing Belt Shields
1. Park mower on a hard, level surface.
2. Stop engine and engage park brake.
3. Lower mower deck to the lowest cutting height position.
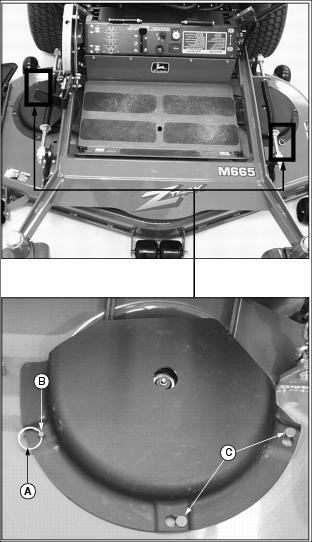
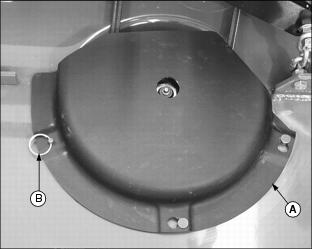
4. Remove belt shield locking rings (A).
Picture Note: 60-Inch mower deck shown.
ˇ Lift corner of belt shield from drilled stud (B). Rotate shield counterclockwise to clear head pins (C).
Installing Belt Shields
ˇ Rotate shield clockwise to engage head pins (C) and drilled stud (B).
2. Install belt shield locking rings.
Replacing Mower Deck Drive Belt
Removing Drive Belt
1. Park machine on a hard, level surface.
2. Stop engine and engage park brake.
3. Lower mower deck lift lever to the lowest cutting height position.
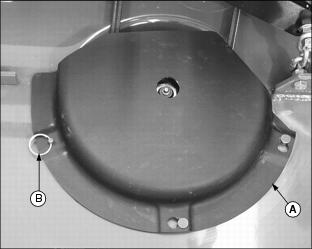
4. Remove both mower deck belt shields (A).
ˇ Remove belt shield locking rings (B).
5. Remove mower deck foot plate.
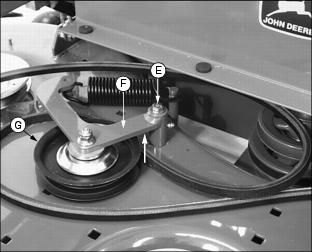
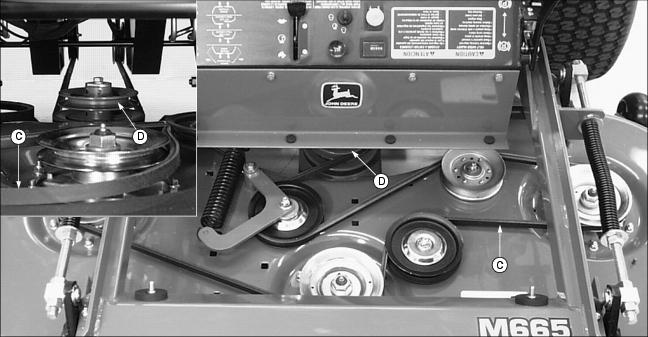
ˇ Remove drive belt from upper jackshaft assembly sheave (D), spindle sheaves and idler pulleys.
ˇ Loosen cap screw (E) enough to allow the idler arm weldment (F) to be raised and the belt slid under idler pulley (G).
ˇ Remove drive belt from mower deck.
Installing Drive Belt
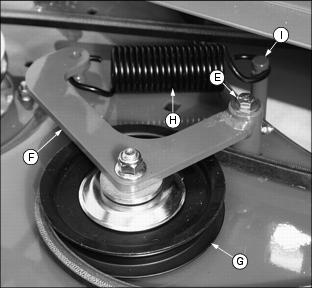
1. Raise the idler arm weldment (F) and slide the replacement belt under idler pulley (G).
3. Check to make sure the belt tension spring (H) is installed properly between the idler arm weldment (F) and stud (I).
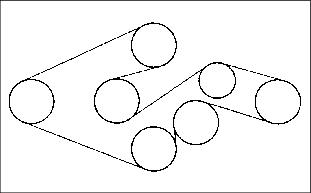
NOTE: If necessary, see drive belt installation label on mower deck.
4. Install replacement drive belt as shown. Make sure drive belt is installed properly on the upper jackshaft assembly sheave, the mower deck idler pulleys and spindle sheaves.
5. Install both mower deck belt shields.
ˇ Install belt shield locking rings.
6. Install mower deck foot plate.
7. Adjust mower deck to a desirable cutting height.
Replacing Mule Drive Belt
Removing Drive Belt
1. Park machine on a hard, level surface.
2. Stop engine and engage park brake.
3. Lower the mower deck lift lever to the lowest cutting height position.
4. Remove both mower deck belt shields (A).
ˇ Remove belt shield locking rings (B).
5. Remove mower deck foot plate.
6. Release mower deck belt spring tension.
ˇ Roll drive belt off of one spindle sheave.
NOTE: It is NOT necessary to remove the drive belt from the mower deck.
7. Remove mower deck belt (C) from upper jackshaft assembly sheave (D).
NOTE: Installation and removal of the mule drive belt is easier if the mower deck is placed in the transport position.
8. Raise the mower deck lift lever to the transport position. (Also the 127mm (5 in.) cutting height position.)
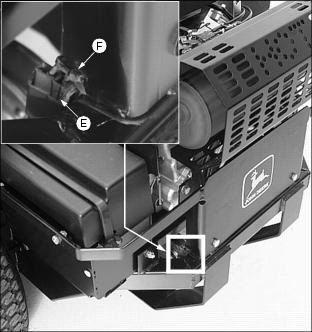
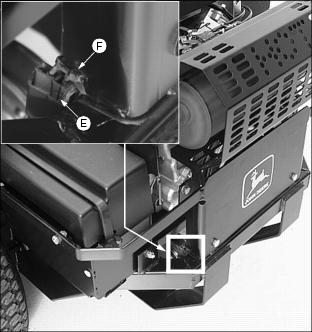
9. Disconnect PTO clutch electrical connection (E).
ˇ Remove plastic tie strap (F) if necessary.
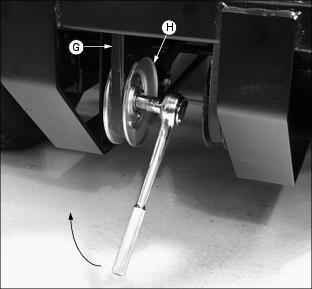
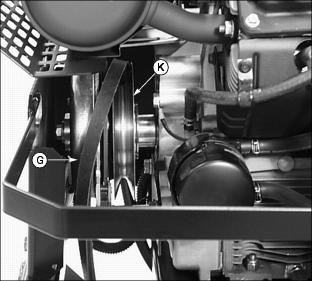
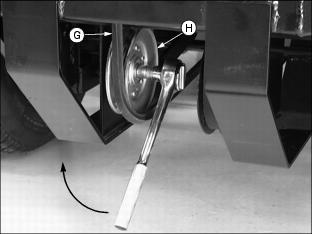
10. Remove mule drive belt (G) from idler sheave (H).
ˇ Removal of the drive belt is easier if a ratchet and 9/16" socket is used to raise the idler sheave and release belt spring tension.
ˇ Roll drive belt (G) to the right and off the idler pulley (H) as shown.
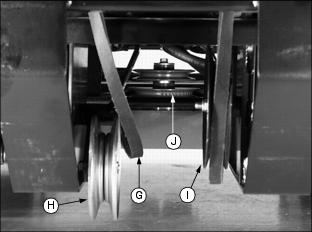
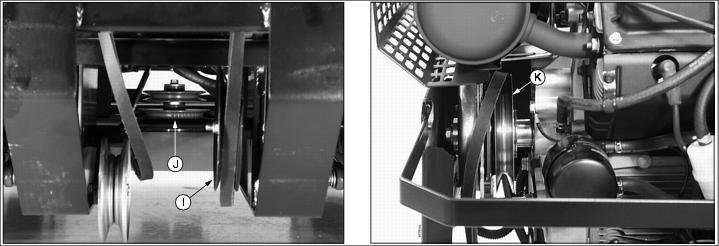
11. Remove drive belt from idler pulley (I) and lower jackshaft assembly sheave (J).
12. Remove drive belt from the PTO clutch sheave (K).
13. Remove drive belt (G) from machine.
Installing Belt
1. Install replacement mule drive belt.
ˇ Install drive belt onto the lower jackshaft assembly sheave (J), idler pulley (I) and PTO clutch sheave (K).
2. Install drive belt (G) onto idler pulley (H).
ˇ Installation of the drive belt is easier if a ratchet and 9/16" socket is used to raise the idler sheave and release belt spring tension.
ˇ Roll drive belt onto idler pulley.
3. Connect PTO clutch electrical connection (E).
ˇ Install replacement tie strap (F) if necessary.
4. Lower the mower deck lift lever to the lowest cutting height position.
5. Install mower deck drive belt.
6. Install mower deck foot plate.
7. Install both mower deck belt shields (A).
ˇ Install belt shield locking rings (B).
8. Adjust mower deck to a desirable cutting height.
Checking and Replacing Mower Blades
Checking Mower Blades
1. Park machine on a hard, level surface.
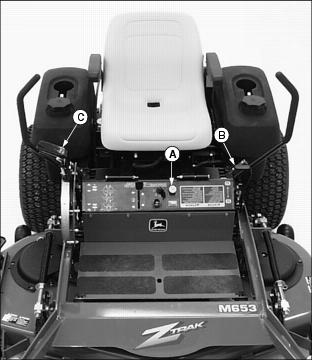
2. Push PTO knob (A) down to disengage mower.
3. Stop engine and engage park brake (B). Wait for all moving parts to stop turning.
4. Raise the mower deck lift lever (C) to the transport position. (Also the 127mm (5 in.) cutting height position.)
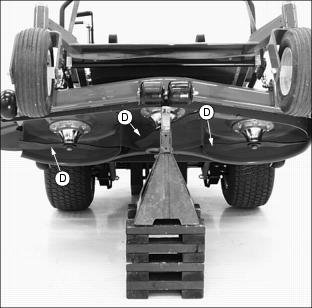
5. Raise front of machine with a safe lifting device.
ˇ Support with jack stands and/or wooden blocks.
ˇ Mower blades should be sharp and free of any damage.
ˇ Inspect blades; sharpen/balance or replace as necessary.
Replacing Mower Blades (54 and 60-Inch Decks)
1. Use a wooden block to prevent mower blades from spinning.
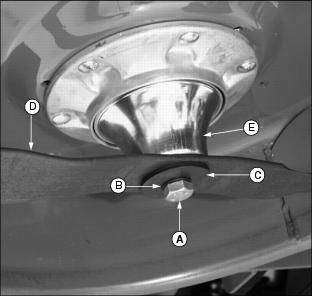
2. Remove cap screw (A), hardened washer (B) large concave blade washer (C), blade (D) and deflector cup (E).
ˇ Blade wing MUST face toward top of mower deck.
IMPORTANT: Avoid damage! When installing the blade: ˇ Make sure the blade is properly seated on the spindle. ˇ Make sure the concave side of the large washer faces towards the blade. |
ˇ Install deflector cup, blade, large concave blade washer, hardened washer and cap screw.
ˇ Tighten blade bolts to 122 Nˇm (90 lb-ft.).
5. Adjust mower deck to a desirable cutting height.
Sharpening Blades
ˇ Sharpen blades with grinder, hand file or electric blade sharpener.
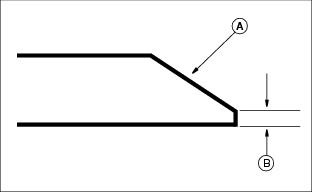
ˇ Keep original bevel (A) when you grind.
ˇ Blade should have 0.40 mm (1/64 in.) cutting edge (B).
Balancing Blades
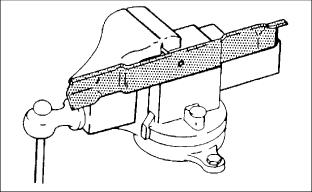
ˇ Put blade on nail in vise or on vertical wall stud. Turn blade to horizontal position.

