![]()
1200A Bunker and Field Vehicle
Introduction
Safety
Controls
Operating
Replacement Parts
Service Machine Safely
Service Intervals
Service Engine
Engine Warranty Maintenance Statement
Changing Engine Oil and FIlter
Service Transmission
Service Steering & Brakes
Service Electrical
Service Miscellaneous
Troubleshooting
Assembly
Specifications
Warranty
John Deere Quality Statement

Service Engine
Engine Warranty Maintenance Statement
Maintenance, repair, or replacement of the emission control devices and systems on this engine, which are being done at the customers expense, may be performed by any nonroad engine repair establishment or individual. Warranty repairs must be performed by an authorized John Deere dealer.
Avoid Fumes
· If it is necessary to run an engine in an enclosed area, use an exhaust pipe extension to remove the fumes. |
Engine Oil
Use oil viscosity based on the expected air temperature range during the period between oil changes.
The following oil is preferred:

Other oils may be used if they meet one of the following:
· API Service Classification SG
· API Service Classification SF
Oils meeting Military Specification MIL-L-46167B may be used as arctic oils.
Checking Engine Oil Level
1. Park machine on a level surface.
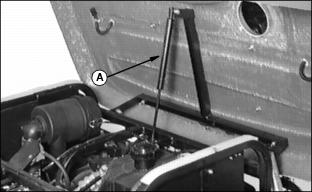
3. Lower the attachment and lift rear hood.
4. Check engine oil when oil is cold.
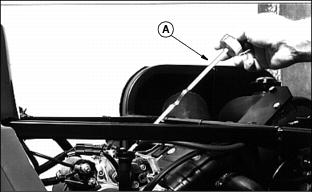
5. Remove dipstick (A). Wipe dipstick with a clean rag.
6. Insert dipstick, but do not screw in.
7. Remove dipstick. Check oil level on dipstick.
8. Oil must be between ADD and FULL marks.
9. If oil level is low, add oil to bring oil level no higher than FULL mark on dipstick. (See Engine Oil in Fuels and Lubricants section for correct oil.)
IMPORTANT: Avoid damage! Change oil and filter after first 25 hours of operation, then after every 100 hours of operation. |
10. Install and tighten dipstick.
Changing Engine Oil and FIlter
NOTE: Change engine oil and filter after first 25 hours of operation. After that, change oil and filter every 100 hours under normal conditions or every 25 hours under extremely dusty conditions.
2. Run engine to warm the oil.
4. Park machine on level surface. Lower attachments and lift rear hood
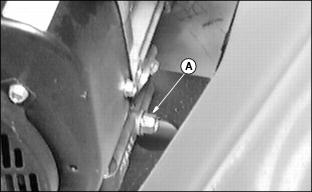
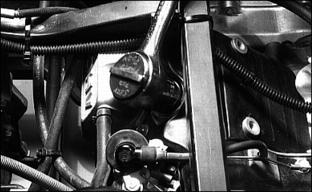
5. Remove drain plug (A) and drain oil from crankcase.
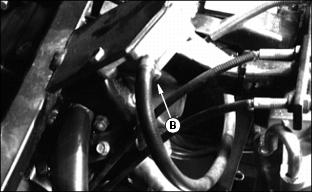
6. Remove oil filter (B) and replace with new filter.
9. Add 1.4 L (1.5 qt) of John Deere PLUS-4 Engine Oil or other oil specified in Fuel and oil section
Replacing Air Filter Element
IMPORTANT: Avoid damage! Air filter should be replaced every 300 hours or once a year under extremely dusty conditions. |

2. Unbuckle hose clamp (B) and remove element (C).
3. Periodically check air cleaner and discard old filter element and replace with new after 300 hours
4. Install element and buckle the two clasp.
Checking Spark Plug
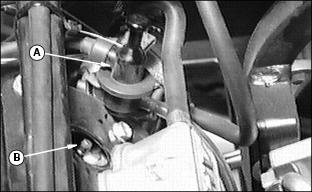
2. Disconnect spark plug wire (A).
4. Clean spark plug carefully with a wire brush.
5. Inspect spark plug for cracked porcelain, pitted or damaged electrodes and other wear or damage.
NOTE: In Canada, replace with resistor spark plug only.
6. Replace spark plug if necessary.
7. Check plug gap with a wire feeler gauge.
8. Gap must be 0.64 mm (0.025-in.).
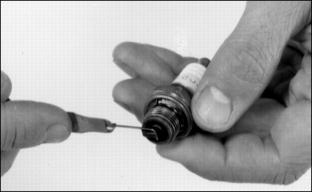
9. To change gap, move the outer electrode.
10. Install and tighten spark plug to 20 N·m (15 lb-ft.).
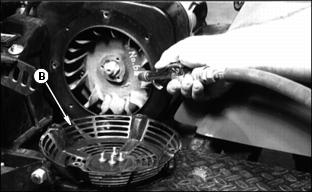
Cleaning Engine Fins
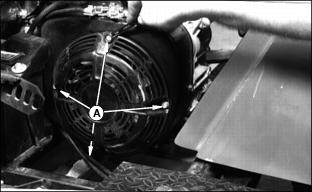
1. Disconnect spark plug wire.
2. Remove four cap screws (A) from shroud.