![]()
2653 Professional Utility Mower
Introduction
Safety Signs
Controls
Operating Machine
Operating Cutting Unit
Replacement Parts
Service Machine Safely
Service Intervals
Service Lubrication
Service Engine
Service Transmission
Service Cutting Units
Service Electrical
Service Miscellaneous
Troubleshooting
Storing Utility Mower
Assembly
Copyright© Deere & Company

Service Miscellaneous
Checking Tire Pressure
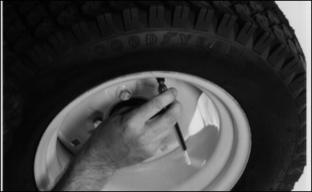
2. Check tire pressure with an accurate gauge.
3. Adjust air pressure, if necessary:
Refueling Machine
IMPORTANT: Avoid damage! DO NOT mix oil with gasoline. Unleaded |
· Use only clean, fresh, unleaded regular grade gasoline.
· Remove any trash from top of fuel tank drain area.
· Never use fuel that is stale or has been stored for a long period of time:
Warm Weather: Maximum 60 days.
Cold Weather: Maximum of 90 days.
· Fill fuel tank at the end of each day's operation. This helps to keep condensation out of fuel tank.
Oxygenates (either ethanol or MTBE) are added to the gasoline. If you use the oxygenated fuel be sure it is unleaded and meets the minimum octane rating requirement.
The following are the EPA approved percentages of fuel oxygenates:
ETHANOL (Ethyl or Grain Alcohol): You may use gasoline containing up to 10 percent ethanol by volume.
MTBE (Methyl Tertiary Butyl Ether): You may use gasoline containing up to 15 percent MTBE by volume.
METHANOL (Methyl or Wood Alcohol): You may use gaoline containing up to 5 percent methanol by volume, as long as it also contains cosolvents and corrosion inhibitors to protect the fuel system. Gasoline containing more than 5 percent methanol by volume may cause starting and/or performance problems. It may also damage metal, rubber, and plastic parts of your fuel system.
2. Remove fuel tank cap slowly to allow any pressure built up in the tank to escape.
3. Fill the tank only to the FULL line.
Tighten Wheel Bolts
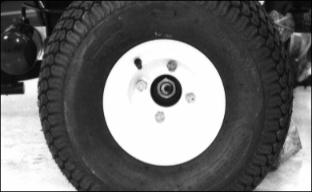
NOTE: Tighten wheel bolts after first 10 hours of operation and every 50 hours thereafter.
Tighten wheel bolts to 81-95 N·m (60-70 lb-ft).
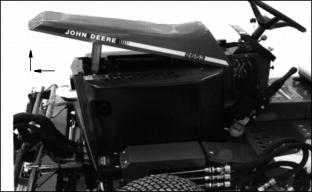
Raising Hood
IMPORTANT: Avoid damage! When installing or removing side panels use care with the left panel because of the exhaust pipe. |
Removing Side Panels
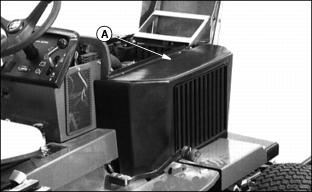
2. Remove side panel (A) in an up and outward movement.
Adjusting The Parking Brake
1. Put the park brake in the DISENGAGED position.
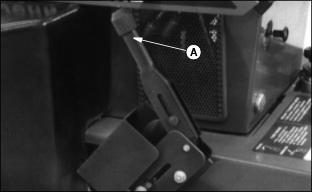
2. Turn lever knob (A) counterclockwise to DECREASE tension:
· Turn lever knob (A) clockwise to INCREASE tension.

3. Adjust nut (B) so that when the park brake is ENGAGED the length of the compression spring (C) is 39-41 mm (1.5-1.6 in.)