Introduction
Safety Signs
Controls
Operating Machine
Operating Mower Deck
Lawn Care
Replacement Parts
Service Machine Safely
Service Interval Chart
Service Engine
Service Transmission
Transmission And Hydraulic Oil
Greasing the Transmission Control Arm
Checking The Transmission Oil Level
Changing The In-line Hydraulic Oil Filter
Changing The Transmission Filter
Replacing The Transmission Drive Belt
Adjusting Transmission Neutral
Service Steering And Brakes
Service 48 & 54 Inch Mower Deck
Service 60 Inch Mower Deck
Service Electrical
Service Miscellaneous
Removing 48 & 54 Inch Mower Deck
Removing 60 Inch Mower Deck
Installing 48 & 54 Inch Mower Deck
Installing 60 Inch Mower Deck
Troubleshooting
Storing Machine
Assembly
Specifications
Warranty
John Deere Service Literature
John Deere Quality Statement
CopyrightŠ Deere & Company

Service Transmission
Transmission And Hydraulic Oil
NOTE: Tractor is filled with John Deere HY-GARDŽ (J20C) transmission oil at the factory. DO NOT mix oils.
Use only HY-GARDŽ (J20C) transmission oil.
Do not use type "F" automatic transmission fluid.
John Deere HY-GARDŽ (J20C) transmission oil is specially formulated to provide maximum protection against mechanical wear, corrosion, and foaming.
IMPORTANT: Avoid damage! If operating temperatures are below -18°C (0°F), you must use Low Viscosity HY-GARDŽ (J20D) or transmission damage will occur. |
Greasing the Transmission Control Arm
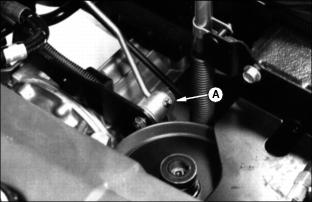
1. Lift seat platform and locate grease fitting (A) on hydrostatic control linkage on top of transaxle.
Checking The Transmission Oil Level
Check the oil level before you start the engine.
1. Lift the seat to the second position.
2. Turn the dipstick (A) to remove it.
3. Wipe the dipstick. Install it but do not turn it. Pull it out.
4. Oil should be in the XX area at the bottom of the dipstick.
5. If not, pour oil into the dipstick tube.
6. Install and tighten the dipstick.
Changing The In-line Hydraulic Oil Filter
1. Park Front Mower safely. Allow the engine and transmission to cool.
3. Remove the hydraulic filter (A):
ˇ Loosen the two fittings (B).
ˇ Catch dripping oil in a container.
ˇ Install a new filter with an O-ring on each side.
5. Change the transmission filter.
Changing The Transmission Filter
1. Park the Front Mower safely.
2. Use a filter wrench to turn the filter (A) counterclockwise. Remove the filter.
3. Catch dripping oil in a container.
4. Put a film of clean transmission oil on the seal of the new filter.
5. Install the filter. Turn it clockwise until it contacts the mounting surface, then 1/2 turn more.
6. Run the engine a short time. Stop the engine.
7. Check the hydraulic oil level. (See "Checking the Transmission Oil Level" in this section.)
8. Add oil, if necessary. Do not run the engine if the transmission oil level is low.
Changing The Transmission Oil
1. Stop the engine. Lock the park brake. Wait until the engine and the transmission are cool.
2. Remove the transmission oil dipstick.
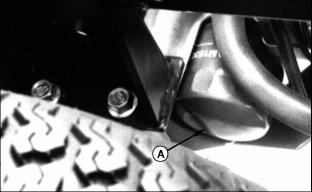
3. Put a container under the drain plug (A).
4. Remove the plug. Drain the oil. Install the plug.
5. Pour oil into the dipstick tube. The capacity is 2.4 L (2.5 qt).
6. Install and tighten the dipstick.
7. Run the engine a short time. Stop the engine.
8. Check the transmission oil level. (See "Checking the Transmission Oil Level" in this section.)
Replacing The PTO Drive Belt
1. Park the Front Mower safely.
2. Disconnect negative (-) battery cable from battery.
3. Remove tension nut (A) on PTO drive belt tensioner.
4. Pull tension belt (B) off of front and rear pulleys (C), and remove belt from frame.
5. Route new belt through tensioner bracket to the right side of the idler pulleys (D). Install groove of belt onto double center lip of engine pulley (E), and PTO gearbox pulley (F).
Picture Note: Belt routing diagram at right is shown from top of Front Mower.
6. Replace tensioner bolt (G), spring (H), and nut (I), into frame bracket. Tighten tensioner nut until length of spring (J) is 70 mm (2-3\4 in.).
Replacing The Transmission Drive Belt
1. Park the Front Mower safely.
2. Disconnect negative (-) battery cable from battery.
3. Raise rear of mower and support frame on jackstands.
4. Remove PTO drive belt. (See "Replacing The PTO Drive Belt" in this section.)
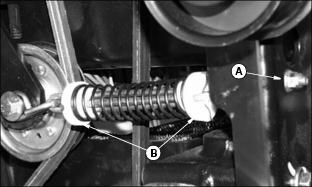
5. Remove tension nut (A) from transaxle drive belt tensioner (B).
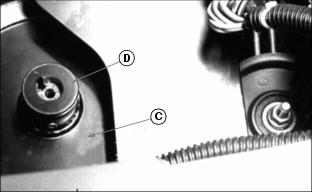
6. Lift transaxle drive belt up and off of tranasaxle drive sheave (C). Lift up and over hub (D) of sheave and pull belt clear from transaxle.
7. Remove spring pin (E) holding electric PTO clutch anti-rotation arm (F) to post (G).
8. Pull anti-rotation arm from post, and rotate PTO clutch (H) counterclockwise one-quarter turn.
9. Pull transaxle drive belt (I) from PTO clutch, and pull belt free from Front Mower.
10. Install new belt around PTO clutch and transaxle sheave.
11. Rotate PTO clutch until hole in anti-rotation arm drops over post, and install spring pin into post.
12. Install tensioner spring throught frame and secure with nut.
13. Lower Front Mower off of jackstands.
Adjusting Transmission Neutral
Adjust transmission neutral to assure that machine DOES NOT creep when pedals are in the neutral position.
You will need a jumper wire, floor jack, and jackstand for this procedure.
1. Park machine on level surface. Park brake disengaged. PTO disengaged. Transmission in neutral.
2. Block right drive wheel to prevent machine from moving.
3. Raise left drive wheel off ground with floor jack. Place a jackstand under left axle housing to prevent wheel from dropping.
NOTE: DO NOT engage differential lock during this adjustment.
4. Have someone push down center of seat cushion to activate seat safety switch, or disconnect connector from seat switch and install jumper wire across wiring harness connector posts.
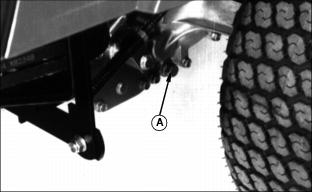
5. Loosen bolt (A) on adjuster cam (B).
6. Start engine and run at fast idle.
7. Rotate cam (C) until left wheel does NOT spin.
8. Tighten bolt. Readjust cam if wheel begins to spin again.


